もちふぃった~
もちふぃった~ (MochiFitter) is a tool for converting outfits designed for a different avatar to fit another avatar. 3+1 supports conversion in both directions: target (other avatar outfit → 3+1) and source (3+1 outfit → other avatar).
Instructions for reverse conversion (3+1 outfit → other avatar) will be added to this manual when A2L support is added.
Download: BOOTH
Superもちふぃった~ requires r59 or later. Versions r58 and earlier cannot correctly convert to 3+1. Please obtain the latest version from BOOTH.
Installation
- Add Modular Avatar to your project via VCC
- Import the MochiFitter Unitypackage into your project
- From the Unity menu, go to Tools → MochiFitter
- Click the Install button (first time only — this may take a while)
Usage
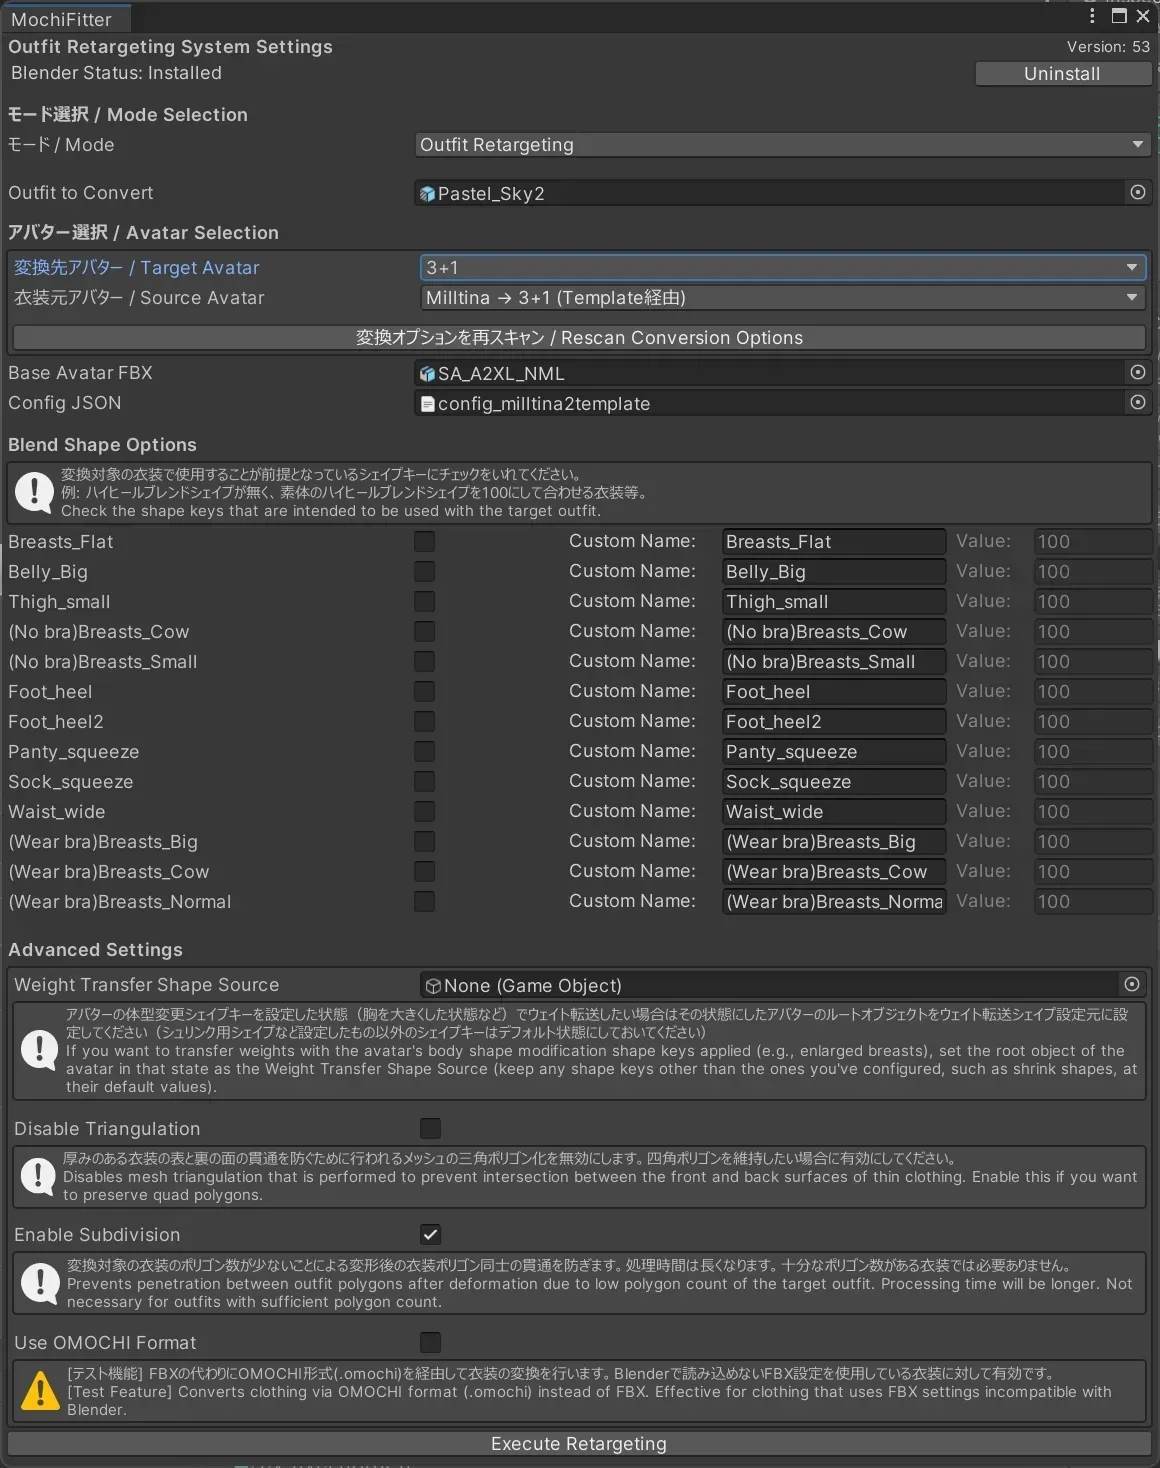
1. Select Mode
Set Mode to Outfit Retargeting.
2. Select Avatars
| Field | Value |
|---|---|
| Target Avatar | 3+1 |
| Source Avatar | The supported avatar for the outfit you want to convert (e.g., Milltina → 3+1 (via Template)) |
After setting these, click Rescan Conversion Options.
3. Set the Outfit to Convert
Drag and drop the prefab of the outfit you want to convert into Outfit to Convert.
4. Configure Blend Shapes
Check only the blend shapes that the source avatar actually uses when wearing that outfit.
Example: when converting Shinano's shoes, if Shinano sets toe_highheel to 100 to deform the foot into a high heel shape when wearing those shoes, check toe_highheel and set the value to 100.
Do not check blend shapes that the source avatar does not use when wearing the outfit. Weight transfer is calculated based on the body mesh with the checked blend shapes applied, so checking unnecessary blend shapes will cause the conversion result to be misaligned.
5. Advanced Settings
| Field | Description |
|---|---|
| Weight Transfer Shape Source | Set this to the avatar's root object when you want to transfer weights with a body shape blend shape applied, such as an enlarged bust. |
| Disable Triangulation | Enable this for outfits where you want to preserve quad polygons. |
| Enable Subdivision | Effective for preventing clipping on outfits with a low polygon count (increases processing time). |
| Use OMOCHI Format | Enable for outfits with FBX settings that cannot be read in Blender (experimental feature). |
6. Execute Conversion
Click the Execute Retargeting button to run the conversion. After it completes, drag the generated prefab onto the avatar's root object.
Compatibility by Body Shape
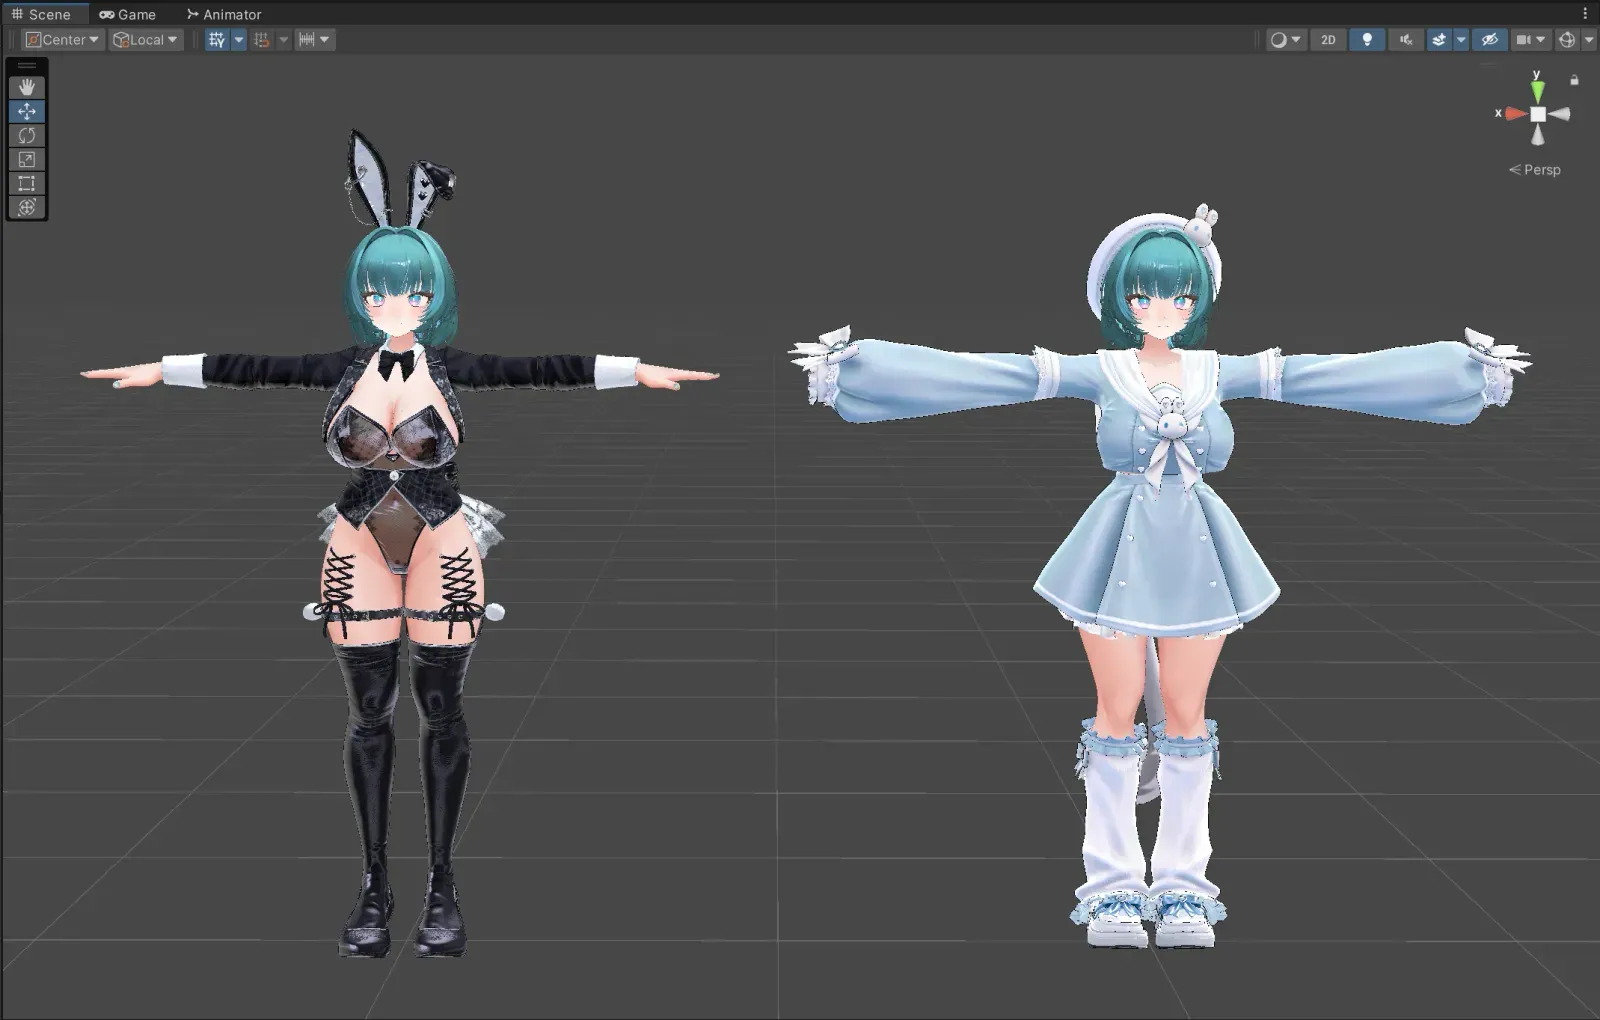
Because 3+1 has a larger bust than many other avatars, converting form-fitting outfits from avatars with a smaller bust may cause distortion around the chest and torso. This is less noticeable with looser designs, but tight-fitting designs may require manual correction.
Compatibility Notes by Source Avatar
| Source Avatar | Compatibility | Notes |
|---|---|---|
| Shinano | ◎ | Few issues, high conversion accuracy |
| Milltina | ○ | Generally good — Milltina Cow and 3+1 have similar chest proportions. Note that many Milltina outfits do not include bust shape keys. FC-exclusive outfits may have lower compatibility. |
| Manuka | △ | Not recommended. Many Manuka outfits implement shape keys with the same names as the avatar but with different behavior, which can cause MochiFitter to malfunction. |
Manual Fixes After Conversion
Shoes
Shoes are particularly prone to distortion after conversion due to how they are fitted to socks. Setting the MF_Origin blend shape added to the converted mesh to 100 restores a shape closer to the original silhouette.
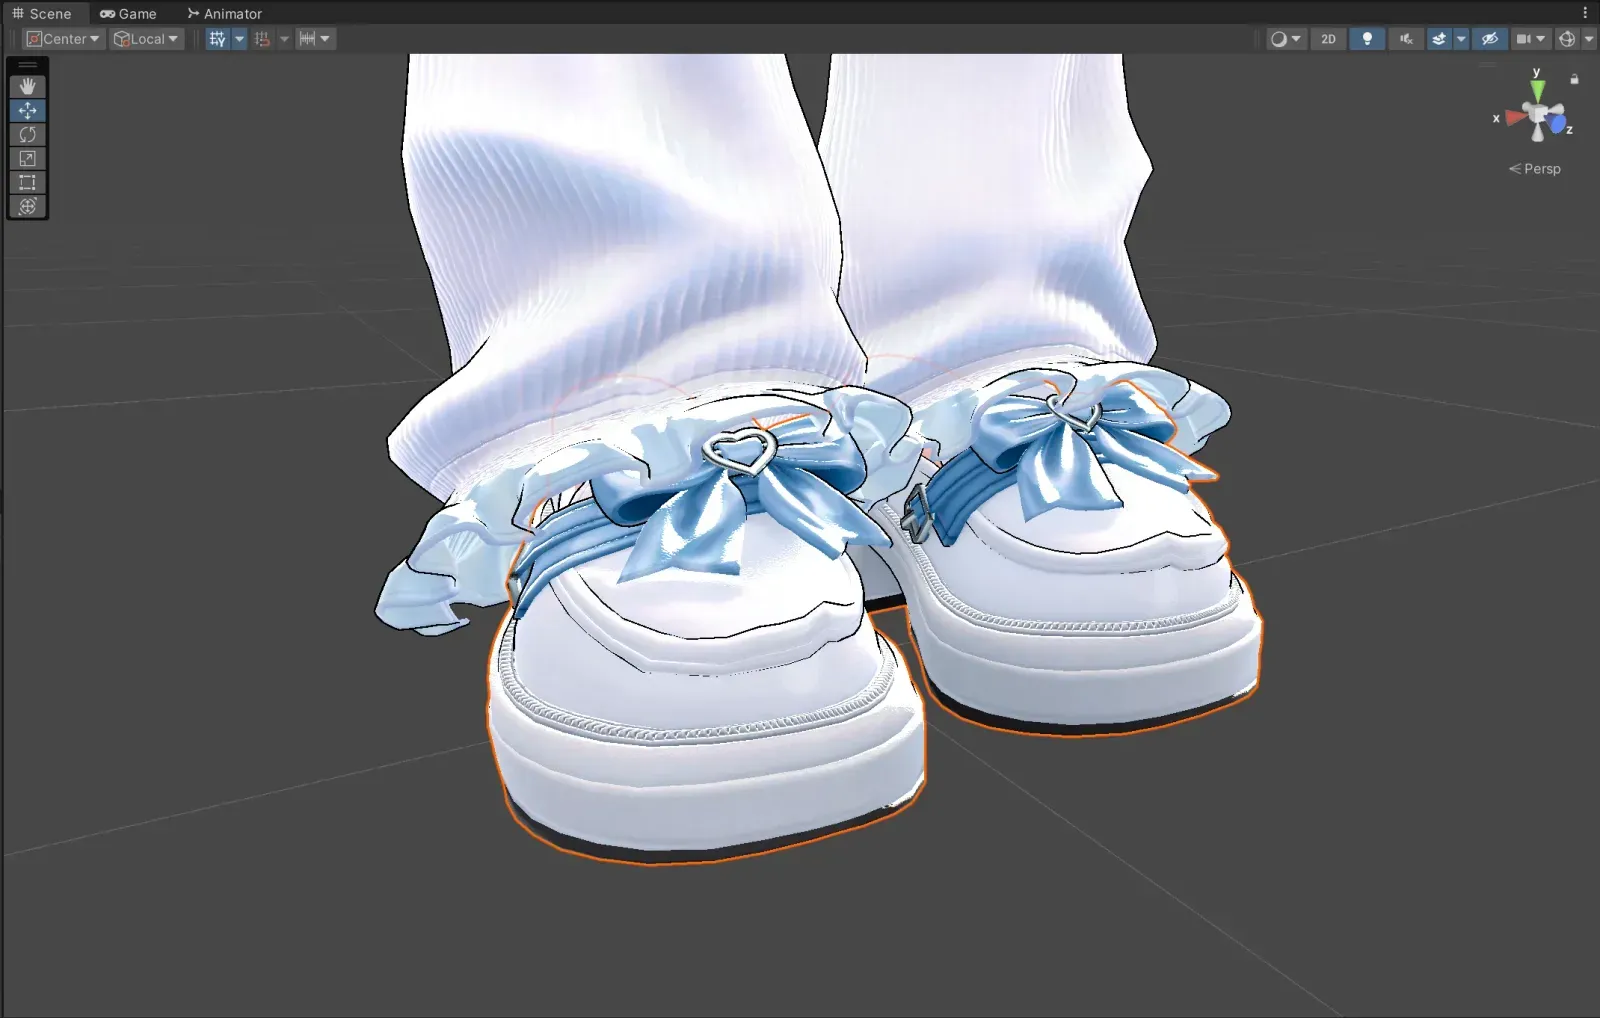
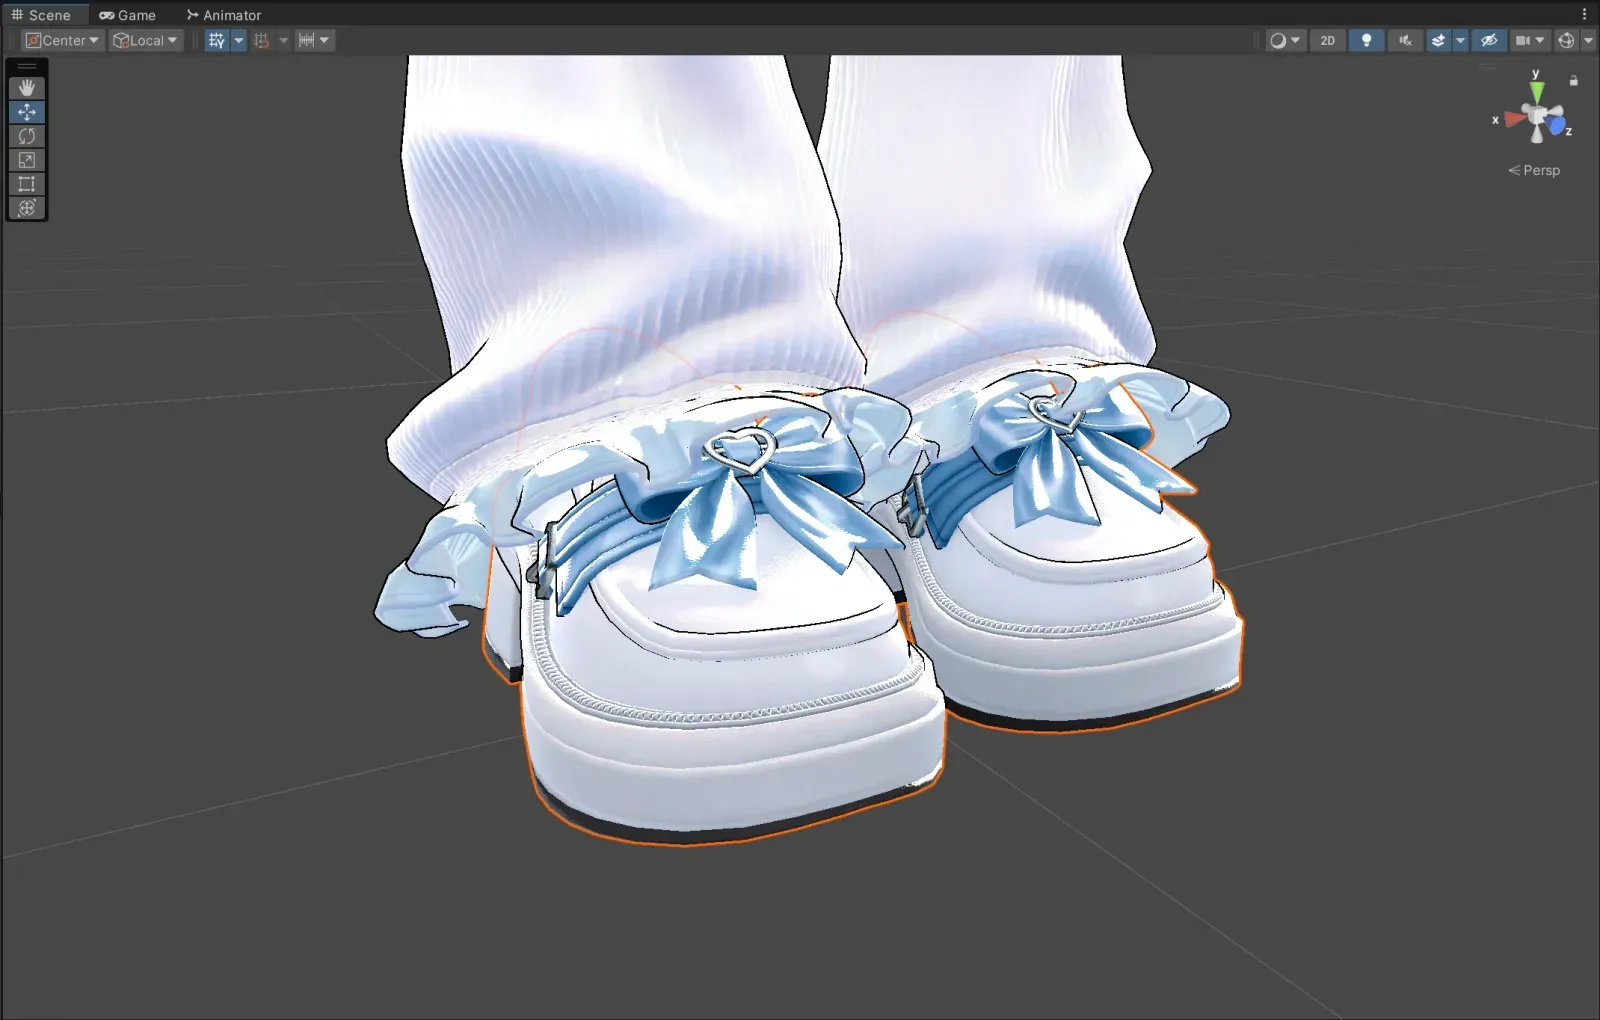
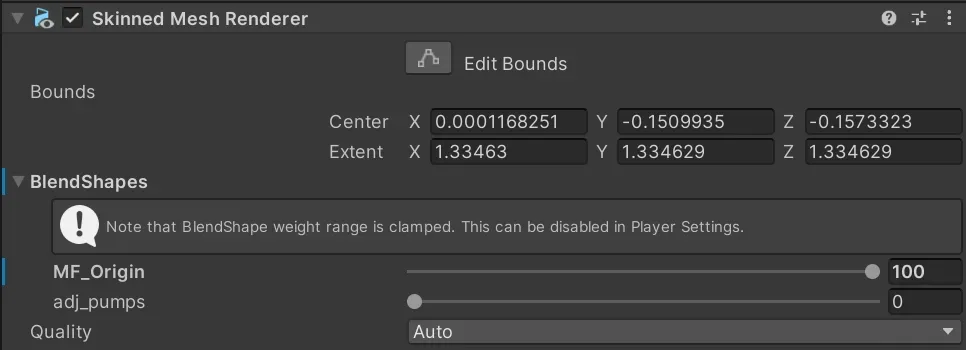
adj_pumps / adj_shrink_ankle(s) / adj_shrink_foot(s) / adj_shrink_toe(s) are especially effective.Outfits with a Chest Center Auxiliary Bone
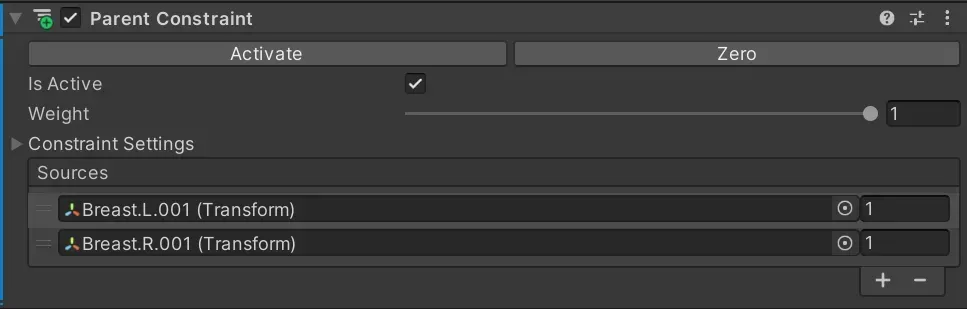
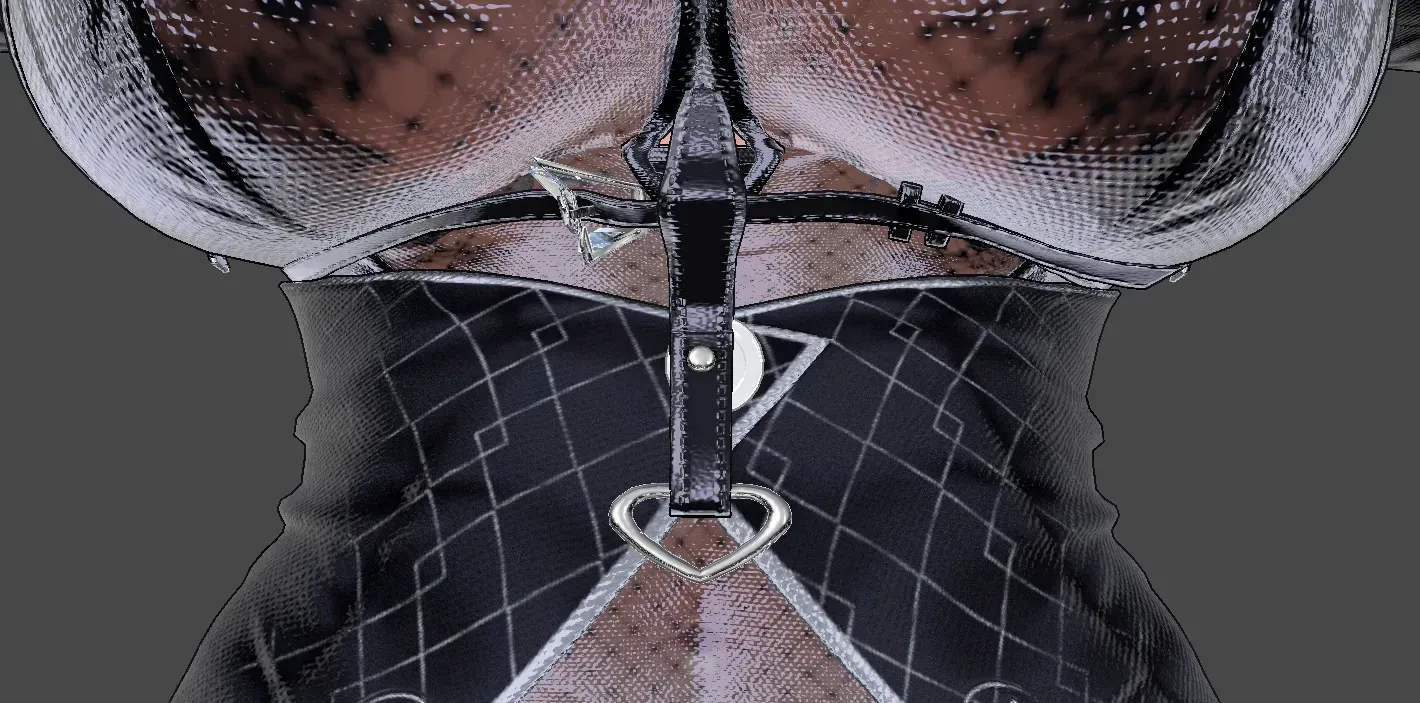
If the outfit being converted has an auxiliary bone controlling the center of the chest, the original setup may include a Rotation Constraint. Because 3+1 has a unique breast bone structure, replacing it with a Parent Constraint works better.
Add Breast.L.001 and Breast.R.001 as sources and set each Weight to 1.